What is a crypto wallet, and how do you use it to interact with DAOs?
Learn about a crypto wallet and how to use them to join and build DAOs.
What is a crypto wallet, and how do you use it to interact with DAOs?
In this guide, you’ll learn about a crypto wallet and how to use them to join, build, and interact with DAOs.
What is a crypto wallet?
A real-world wallet is where you hold your cash. In the web3 world, a crypto wallet is similar—except here, it’s where you hold your tokens (also called crypto or cryptocurrencies).
You can think of your crypto wallet as your access point to the blockchain. You use your wallet to interact with the blockchain to buy, sell, move, and store tokens, and create and confirm actions in blockchain-enabled organizations like DAOs.
A wallet is necessary to interact with DAOs, because you’ll need to hold tokens to cast votes. You’ll also probably be paid in crypto from the DAO, which requires a wallet.
Think of setting up your wallet as your first big leap into the DAO space. We’ll guide you through every step in this guide.
Non-custodial vs. Custodial wallets
When interacting with a DAO, such as casting a vote, you’ll need a non-custodial wallet. Sometimes called a decentralized wallet, these wallets are not run by a centralized company. Instead, a non-custodial wallet is a piece of code that allows you to interact with the blockchain without a middleman.
Having a non-custodial crypto wallet means that you alone have access to your crypto. There’s not a bank or company holding your assets for you. This can be liberating, but it also comes with the responsibility of keeping your wallet secure.
Just like a real-life wallet filled with cash, if you lose your wallet, your funds are gone. There are no customer service lines to call or insurance to back it up. So, each step should be taken very seriously.
A custodial wallet is a wallet in which another party controls your private keys. For example, Coinbase and Gemini are custodial wallets.
While a custodial wallet lessens personal responsibility, it requires trust in the custodian that holds your funds. You also typically can’t sign into decentralized applications with a custodial wallet, and you often can’t purchase or receive governance tokens, since those are often only listed on decentralized exchanges.
When you set up a non-custodial crypto wallet, you’ll receive a secret recovery phrase, which is a list of 12 to 24 words that you can use to restore the wallet in case you lose access. It’s essential to write this phrase down on multiple pieces of paper and store in various safe places. Never write your seed phrase on anything that touches the internet, or give it to anyone. Security is in your hands.
Setting up a custodial wallet will look more familiar to you. You’ll likely connect your bank account or credit card, and do a KYC process where you'll share aspects of your identity. You’ll also get verification emails and information from the company. When using a custodial wallet, security is in the hands of the company.

Hot vs Cold wallet
There are two types of non-custodial wallets:
- Hot wallet
- Cold wallet
A Hot wallet refers to any cryptocurrency wallet that is connected to the internet, such as browser extension and mobile app wallets. Generally, hot wallets are easier to set up and access. But, hot wallets are also more susceptible to hackers and other technical vulnerabilities. They are free to use. The most popular Ethereum hot wallet is MetaMask, and we’ll walk you through the set up next.
A Cold wallet (sometimes called cold storage) refers to any cryptocurrency wallet that is not connected to the internet. This device looks like a USB stick, and plugs into your computer.
You can connect a cold wallet to a hot wallet, meaning you interact with the blockchain via the hot wallet, but sign transactions with the cold wallet. Generally, cold storage is more secure, but it doesn’t mean you shouldn’t use basic security practices.
Examples of cold storage devices are Ledger and Trezor. You’ll have to pay a one-time fee for the device. Be sure to order the devices from their official websites, and that the device that arrives was not opened and doesn’t have a seed phrase written on the paper you receive.
How to install a hot wallet on your computer
Installing MetaMask
Visit the MetaMask website and download the browser extension on Chrome, Firefox, Brave, or Opera (Safari does not support it). Once the download is complete, you should be directed to a setup page automatically.
Note: it is very important to download the extension from the true MetaMask page, so follow the hyperlink above. Don’t simply google search “MetaMask,” because you may land on a scammer’s lookalike site.
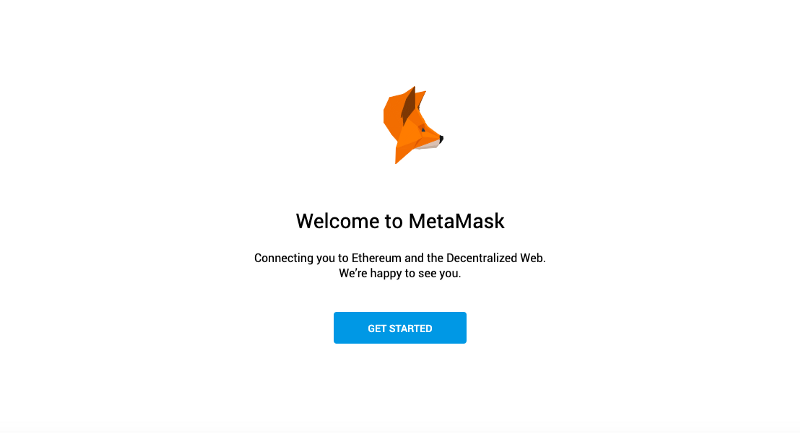
- Follow the instructions to set up your MetaMask account.
- Once your MetaMask setup is complete, you should be redirected to your newly created wallet account. You’ll be able to access this wallet as a pop-up in your browser.
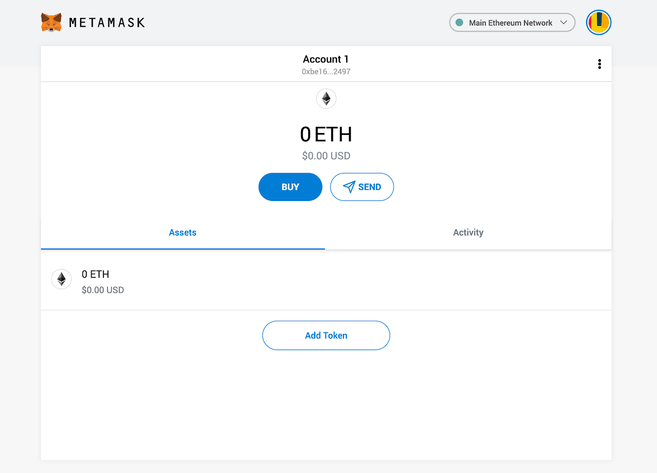
Important Security Consideration: Your Secret Recovery Phrase.
The most important step in the process is storing your wallet’s seed phrase, which is a series of words that you need to write down in multiple safe places. Never store your seed phrases on anything that touches the internet—not even a pdf on your computer. For more information on storing your seed phrase, read this guide.
Remember, if you lose the access to the wallet, the only way to access it again is the seed phrase. Without the seed phrase, your funds are lost forever. This is the reality of self-custody: there’s no customer service line to call or person to recover your funds for you.
Don’t share your seed phrase with anyone. Think of your seed phrase like a house key: anyone who has it can get inside. If someone asks for your seed phrase, they’re scamming you.
Your Account address
Now that you have installed your wallet, it’s time to start using it. If you click on the three dots in the upper right hand corner of the webpage, a popup will appear. Click “account details” to see your account address. It should begin with a “0x” followed by a string of numbers and letters, like this:
0x931D387731bBbC988B312206c74F77D004D6B84b
This is your public address (or public key). You can use this to deposit funds on your wallet (we will explain this in a dedicated section below) or to share this with other people to receive ETH or other tokens. Think of this like your house address: you share it with others, but you never give out the house key (seed phrase).
Configure networks on your wallet
On your wallet there are some pre-configured networks. To explore them, go to the top right, you should see a dropdown menu with Main Ethereum Network selected. When this option is selected, you are able to interact directly with the main Ethereum blockchain.
If you click on it, a selection of other networks will appear.
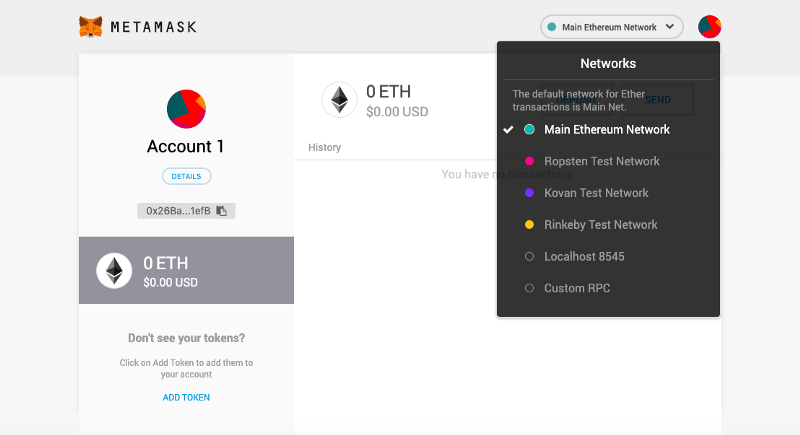
There are three testnets configured on MetaMask (Rinkeby, which you see in the image, is no longer in use). These testnets are mostly used by developers to test their smart contracts:
- Ropsten
- Kovan
- Sepolia
You can also add other networks on the wallet. To do so, follow these steps:
- Click on the colored circle in the top right corner of the browser extension.
- Go to settings,
- Select network,
- Click add networks,
- Fill in the fields of the network configuration (you can find them in the subsequent table) and save.
Network configurations:
For more information on how to configure a network, read our advanced documentation here.
What are gas costs?
Each interaction with the blockchain, which includes DAO activities such as voting, is called a transaction. You must click a button in your wallet to approve each transaction, as well as pay a fee, or “gas fee.” These gas fees are paid to the miners that “write” the transaction on the blockchain. Gas fees vary between a few dollars to hundreds, depending on the type of transaction and the congestion of the network (the number of other people also running a transaction).
Gas fees ensure your transaction is included in the next block on the chain. Block space follows a supply and demand model, meaning the more the network is being used, the higher gas fees will be. Gas fees are typically highest during European and American business hours, and decrease at night and on the weekends.
Gas fees are calculated in a small unit of Ethereum called gwei. You can track the gas fees on the Etherscan gas tracker. Always keep some Ethereum in your wallet to pay gas fees—you can’t pay in any other coin.
How do you add funds to your wallet?
To get funds into your wallet, you’ll need to use an “on-ramp” such as Coinbase, Gemini, Binance, or FTX. These on-ramps interact with both banks and the blockchain. So, you can connect a bank account, use your fiat currency to purchase crypto on the on-ramp, and then send that crypto to your wallet by pasting in your public wallet address.
If you’re testing your DAO on a testnet, you’ll need to acquire the testnet tokens on one of the faucets, linked below. These fake tokens don’t have value and can’t be sold. Instead, they’re used to test that your smart contracts are working.
Start using your wallet with your DAO
To start using your wallet with your DAO, you need to log in to your wallet with your password and choose the network the DAO is deployed on. Keep the browser extension open.
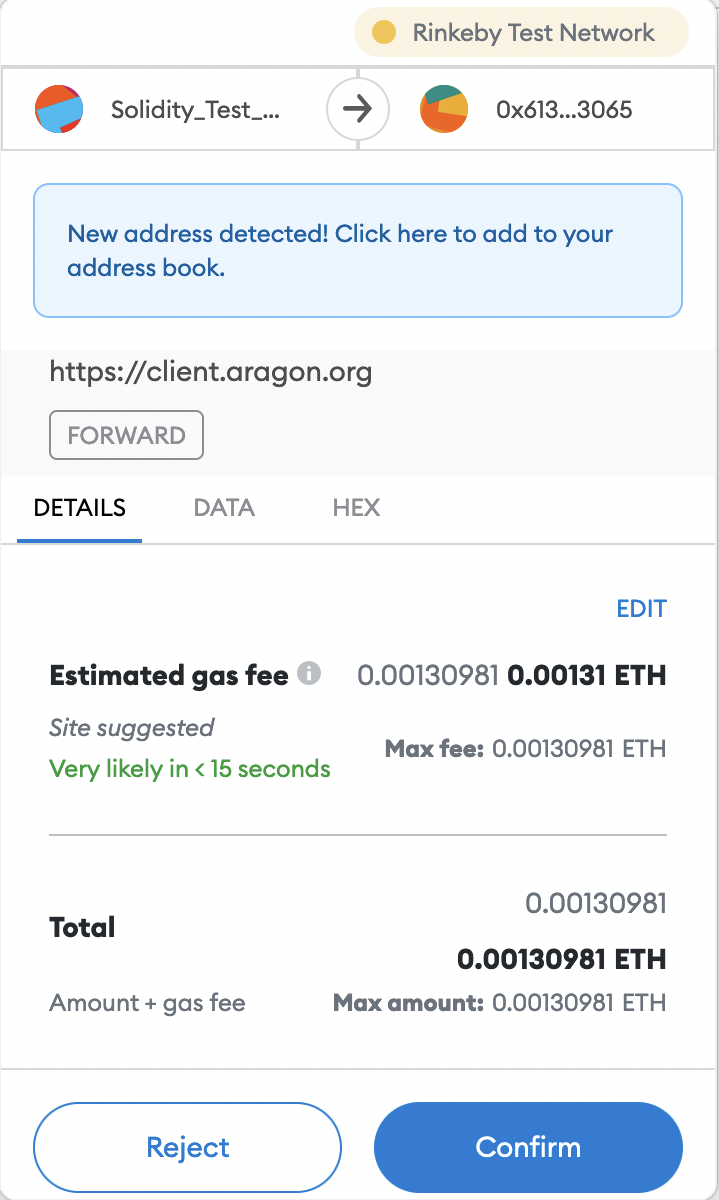
When you’re voting in the DAO, you’ll need to connect your wallet to the application your DAO uses to vote. That will require signing a transaction in the popup window—simply click the blue button that says “Sign.” Remember, every time you vote in the DAO, you will need to sign a transaction.
For each on-chain vote, you will need to pay gas fees. MetaMask shows how much each transaction costs before you sign it. If your DAO only votes off-chain, like on Snapshot, you may need to connect your wallet and sign a transaction, but won’t pay gas fees.
We used an old testnet called Rinkeby for this demo. Nothing will change on your end except the name of the chain in the top right corner.
What is Wallet Connect?
Some crypto wallets have corresponding mobile wallet applications. For example, you can get a MetaMask app on your phone.
WalletConnect is how you link the mobile app wallet with the one on your internet browser.
To connect your wallet account from your phone, follow these steps:
- Access the DAO on the browser and proceed with “connect account”.
- Select the wallet connect button.
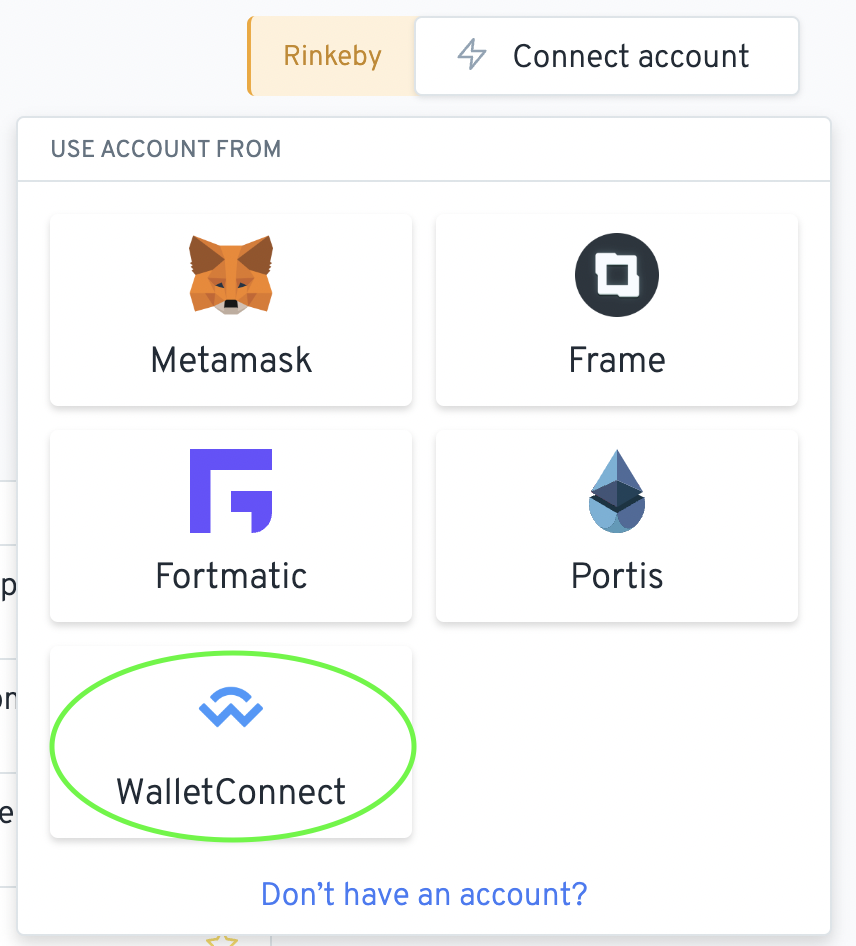
A QR code will appear on your computer screen.

- On your phone, open your wallet, click the “wallet connect” button, and scan the QR code.
Now, you can use your phone wallet on your computer to vote or interact with your DAO.
Final Note: Take these steps slow at first, and soon they will be second nature
Using a wallet for the first time can be confusing and intimidating. It’s completely normal to be uncertain at the start, but once you get used to interacting with the blockchain, it will become part of your everyday life. Take your time between each step and make sure you fully understand what you’re doing as you move forward. Be careful and don’t click on links that look malicious. Practicing internet safety is especially crucial in this step of the DAO creation process!
